- التسوق ، اصبح سهلا.
- /
- احصل على التطبيق!
Cross References:
Replacement for Hendrickson S-21307
Replacement for Meritor R309575
Replacement for Sirco SH2034
Replacement for BWP HE9AA-T
Replacement for Dayton 334-936
Replacement for Euclid E-9575
Replacement for Tiger Tool 15040
Applications:
Replacement for Hendrickson TS S-24691
Replacement for Dayton TS 334-1576
Replacement for Automann TS TRB5912
Replacement for Gaff TS 13628
Replacement for Flagg TS HT245
Replacement for Euclid TS E-10729A
Bushing Installation:
-Apply lubrication to the bushing and insert it into the compression cylinder.
-Position the plunger above the bushing, ensuring alignment between the marks on the bushing and plunger. The four respective pins for the bushing type being installed must fit into the bushing.
-Tighten retaining nuts to eliminate slack. Utilize a hammer adapter if the bushing is stuck. Verify alignment of the plunger with marked points on the beam tube and ensure pin engagement with the bushing. Connect hydraulics to start the installation process.
-Following each 2-inch stroke, re-tighten nuts to remove slack (usually requiring 3-4 adjustments for most bushings). Keep the tool threads well-lubricated before and during use to prevent thread damage.
Bushing Removal:
-Mark the orientation of the bushing on both the beam tube and compression tube.
-Alignment of spring pins with bushing holes is not necessary during the removal process.
-Eliminate any slack by tightening retaining nuts. In case of a seized bushing, use a hammer adapter. Connect hydraulics to initiate the removal task.
-After every 2-inch stroke, readjust the nuts to remove slack (typically requiring 3-4 adjustments for most bushings).
 مجموعة ادوات ازالة حواف السيارات من جوجوي لوكس، مجموعة ادوات اصلاح تنجيد السيارة، مجموعة ادوات مع شنطة بسحاب
KWD 11.500
مجموعة ادوات ازالة حواف السيارات من جوجوي لوكس، مجموعة ادوات اصلاح تنجيد السيارة، مجموعة ادوات مع شنطة بسحاب
KWD 11.500
 Uxcell 5 بوصة 1500 حصى مثقاب كهربائي فرشاة تنظيف البلاط وسادات التنظيف 5 قطع
KWD 5
Uxcell 5 بوصة 1500 حصى مثقاب كهربائي فرشاة تنظيف البلاط وسادات التنظيف 5 قطع
KWD 5
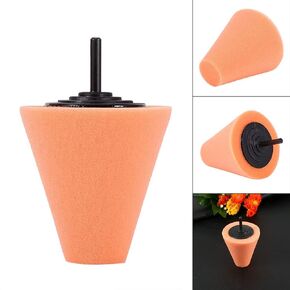 وسادة إسفنجية لتلميع المخروط الأسفنجية، قطعة واحدة من وسادات تلميع على شكل مخروط فوم للعجلات - تُستخدم مع المثقاب الكهربائي
KWD 3
وسادة إسفنجية لتلميع المخروط الأسفنجية، قطعة واحدة من وسادات تلميع على شكل مخروط فوم للعجلات - تُستخدم مع المثقاب الكهربائي
KWD 3
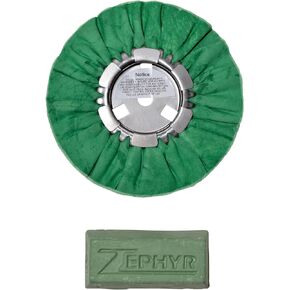 عجلة تلميع مجرى الهواء باللون الأخضر مقاس 8 بوصات من Zephyr Products AWG58-8WB مع شريط أخضر بوزن 1 رطل متوسط/لايت، عبوة واحدة
KWD 8.500
عجلة تلميع مجرى الهواء باللون الأخضر مقاس 8 بوصات من Zephyr Products AWG58-8WB مع شريط أخضر بوزن 1 رطل متوسط/لايت، عبوة واحدة
KWD 8.500


