- Shopping, made easy.
- /
- Get the app!
Laptop Stands
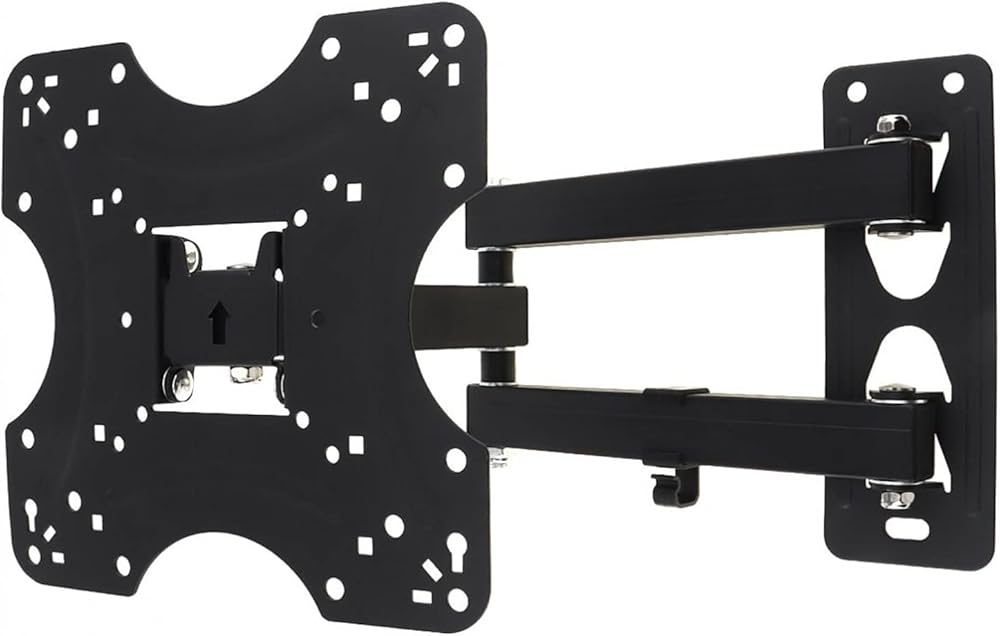
Description
Type:Adjustable Type
Applicable Size:17 - 42 inches
Material:Cold Ligation Board
Distance From the Wall:40-410MM / 1.5748Inches
Max Capacity:22KG / 48.51LB
Up and Down Tiltable Angle:12 degrees
VESA Standard Pitch:200mm x 200mm, 200mm x 100mm, 100mm x 100mm, 75mm x 75mm
Left and Right Tiltable Angle:180 degrees
Color: Black
Swivel Angle: 180°
Features:
- Arm mouth with dust cover to prevent foreign bodies such as dust from entering the tube.
- Designed with cable clamp and detachable harness card.
- The one-piece panel is simple and easy to operate.
- Automatic telescopic adjustment design, stretchable and rotatable.
- The key parts are thickened, the structure is stable, and the ability to withstand weight is strong.
- PC material design,with good flexibility, scratch resistance,beautiful appearance.
- The tilt elevation angle can be adjusted to -2° to 10°.
- High-intensity rotating shaft that can withstand multiple rotations without deformation.
- Safety screw design ensures no offset under load.
Applicable scope: Suitable for most HDTV flat screen TVs, LCD TVs, LED TVs, plasma TVs. For example, fit for , , Sharp-AQUOS, Sanyo, Plasma TV. Suitable for home, entertainment, public places and commercial establishments such as living room, KTV, bar, airport, train station, bus station, shopping mall, store waiting hall, lounge, large conference room, classroom, lobby and restaurant.
Installation and operation instructions:
1. Use the wall plate as a templet to drill four holes of 10mm diameter and 50mm depth in the concrete wall. Then wedge four plastic concrete anchors into the holes.
2. Install the wall plate, Putthe wall plate on the wall,and then screw four lag bolts into each plastic concrete anchor through metal washer to four the lag bolt,the plastic concrete anchor and the wall.
3. Install the monitor brackets onto the back of the p
 OL-2 Aluminum Height Adjustable 17-32 inch Dual Screen Monitor Holder Arm Full Motion Monitor Mount Bracket Desktop Stand(Silver)
KWD 66
OL-2 Aluminum Height Adjustable 17-32 inch Dual Screen Monitor Holder Arm Full Motion Monitor Mount Bracket Desktop Stand(Silver)
KWD 66
 BL-LG312A Ultra-Long Gas Spring Arm 17"-27" Monitor Holder Full Motion LCD TV Mount Loading 1.5-7kgs VESA 75/100mm
KWD 91
BL-LG312A Ultra-Long Gas Spring Arm 17"-27" Monitor Holder Full Motion LCD TV Mount Loading 1.5-7kgs VESA 75/100mm
KWD 91
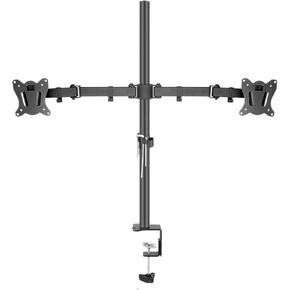 600mm T902-260Q T902-260Q Desktop Stand Full Motion 360 Degree Steel Pc Holder 10"-27" Clamp Base Monitor Mount Arm Load 15kg(Clamp Base)
KWD 64.500
600mm T902-260Q T902-260Q Desktop Stand Full Motion 360 Degree Steel Pc Holder 10"-27" Clamp Base Monitor Mount Arm Load 15kg(Clamp Base)
KWD 64.500
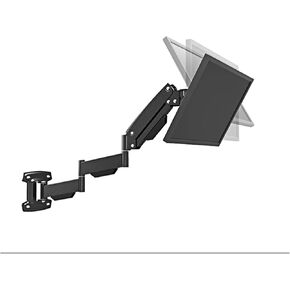 BL-LG312B Gas Spring Arm Wall Mount Monitor Holder Full Motion Heavy Duty 17-27" LCD TV Mount Bracket Loading 2-9kgs
KWD 90.500
BL-LG312B Gas Spring Arm Wall Mount Monitor Holder Full Motion Heavy Duty 17-27" LCD TV Mount Bracket Loading 2-9kgs
KWD 90.500