- التسوق ، اصبح سهلا.
- /
- احصل على التطبيق!
Product Name: 24-Port Cat6 Patch Panel.
Patch panels Cat6 wall mounted, support stable connections and ultra-high speed performance up to 10Gbps.
Standard 19-inch 1u patch panel for rack, wall or cabinet mounting.
Product dimensions: 483mm x 95mm x 45mm .
Installation Procedure.
1.The patch panel can be used for 22AWG-24AWG copper wire clamping.
2.Use wire stripping tool to strip the cable sheath, be careful not to damage the twisted pair cable.
3. Place the network cable in the back of the distribution frame, corresponding to the rear of the distribution frame in the order of the colour coding, the twisted pair of 4 pairs of cables in accordance with the upper and lower rows of the colour coding of the one-to-one correspondence with the IDE terminal slots.
4. Make the separation of the twisted pair cables as short as possible during installation.
5. Press the twisted pair into the slot by the 110-type wire punch tool and pierce the skin.
6. Cut off the excess twisted pair of wires at the IDE end and trim them.
7.Install the wiring rack in the cabinet.
8.Neatly bundle the network cable in the cable management bracket comes with the distribution frame.
9. All the card line sequence must be in accordance with the patch panel colour coding of the upper and lower rows of ANSI/TIA/EIA-568A or 568B.
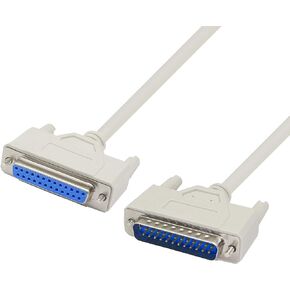 كابل طابعة موازية بطول 4.5 أقدام DB25 ذكر إلى أنثى يوشنغ للتوصيل بين جهاز كمبيوتر مع واجهة أنثى DB25 والطابعة
KWD 4
كابل طابعة موازية بطول 4.5 أقدام DB25 ذكر إلى أنثى يوشنغ للتوصيل بين جهاز كمبيوتر مع واجهة أنثى DB25 والطابعة
KWD 4
 -25%
30 سم DB9 Y كابل DB9 9 دبوس 1 أنثى أنثى إلى 2 ذكر Rs232 محول منفصل متسلسل كابل من خلالها يوتشنغ لتوصيل العديد من الأجهزة المتسلسلة المتصلة
KWD 3
-25%
30 سم DB9 Y كابل DB9 9 دبوس 1 أنثى أنثى إلى 2 ذكر Rs232 محول منفصل متسلسل كابل من خلالها يوتشنغ لتوصيل العديد من الأجهزة المتسلسلة المتصلة
KWD 3
 PNGKNYOCN 30 سم مباشرة عبر الكابل التسلسلي DB9 RS232. كابل RS232 أنثى إلى أنثى بزاوية 90 درجة من اليسار إلى اليمين، YOUCHENG، لأجهزة الكمبيوتر والطابعات والماسحات الضوئية (L/R)
KWD 2.500
PNGKNYOCN 30 سم مباشرة عبر الكابل التسلسلي DB9 RS232. كابل RS232 أنثى إلى أنثى بزاوية 90 درجة من اليسار إلى اليمين، YOUCHENG، لأجهزة الكمبيوتر والطابعات والماسحات الضوئية (L/R)
KWD 2.500
 PNGKNYOCN DB9 إلى 10Pin IDC كابل تسلسلي، 2 حزمة RS232 ذكر تسلسلي إلى 10 دبوس (2x5) IDC لوحة رأس اللوحة الأم جبل كابل الشريط المسطح (1.8 متر/5.9 قدم)
KWD 3.500
PNGKNYOCN DB9 إلى 10Pin IDC كابل تسلسلي، 2 حزمة RS232 ذكر تسلسلي إلى 10 دبوس (2x5) IDC لوحة رأس اللوحة الأم جبل كابل الشريط المسطح (1.8 متر/5.9 قدم)
KWD 3.500


