- Shopping, made easy.
- /
- Get the app!
Lower Control Arm Prying Tool
Under the hood and undercar special service tools for the modern technician everything you need to service a vehicle or motorcycle
Material:
heavy duty steel, will not bend
Package includes:
3 pack lower control arm prying tool
Instructions:
1. Get a long pry bar, strong rod or pipe at least 1.5 times the length of the lower control arm.
2. Remove ball joint nut (or slacken if you don't have space) and free up ball joint stud from steering knuckle by your regular method.
3. Hang the hook on the lower control arm (the hole should be below. The side you choose will depend on the shape of the arm to gain more leverage but it will work on either side if you complete the 3rd step properly).
4. Pass your pry bar (or any strong bar/pipe) through the hole.
5. Ensure the other end of the pry bar connects properly with the inned part of the lower control arm, so it won't slip.
6. Pry downward on the handle of pry bar until the ball joint stud is out of the steering knuckle. . (If there was not enough space to remove the ball joint nut before, back it off, all the way at this step, until you can push the control arm down enough. )
7. Pull/push steering knuckle away from ball joint while maintaining a downward force on the pry bar.
When reinstalling the arm to the steering knuckle, follow steps 2 to 5.
Notes:
1. You also need a pry bar to make use of this control arm removal tool.
2. It's ability to slip right over the arm because of the open side in the tool, can also present a risk for slipping. So long as you pay attention though, I'd say you're good.
3. You'd have to have the car at least 3 feet in the air for it to do any good
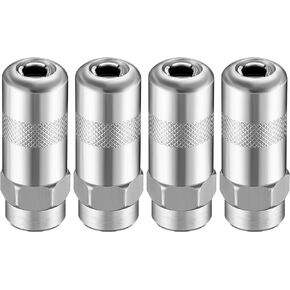 Meonum 4 PCS Grease Gun Couplers, Grease Gun Tip Replacement Grease Gun Needle Tip, 1/8 Inch Grease Gun Needle Tip, Grease Gun Fittings
KWD 4.500
Meonum 4 PCS Grease Gun Couplers, Grease Gun Tip Replacement Grease Gun Needle Tip, 1/8 Inch Grease Gun Needle Tip, Grease Gun Fittings
KWD 4.500
 -22%
Meonum 2 Pack Brake Bleeder Hose, Motorcycle Brake Bleeder Kit with 6 Nozzle Cap & Clamp, One Way Check Valve Tube Bleeding Tools, Hydraulic Brake System Bleeding, Car Clutch Brake Fluid Bleeder Hose
KWD 3.500
-22%
Meonum 2 Pack Brake Bleeder Hose, Motorcycle Brake Bleeder Kit with 6 Nozzle Cap & Clamp, One Way Check Valve Tube Bleeding Tools, Hydraulic Brake System Bleeding, Car Clutch Brake Fluid Bleeder Hose
KWD 3.500
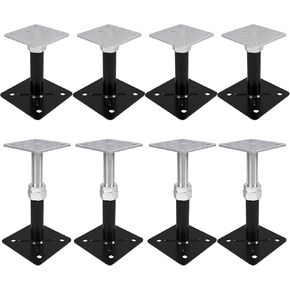 Screw Jack, 8 pcs Floor Jacks,Floor Straightener,Adjust Supports, Lift Supports, Level Supports, Adjustable House Jack for The Floor, Post 5" to 8"
KWD 29
Screw Jack, 8 pcs Floor Jacks,Floor Straightener,Adjust Supports, Lift Supports, Level Supports, Adjustable House Jack for The Floor, Post 5" to 8"
KWD 29
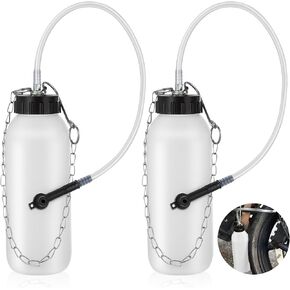 2PCS 1L Brake Bleeder Bottle with 20 Inch Tube and Rubber Connector, One Person Brake Bleeder Bottle Brake Bleeder Kit Suitable for Cars, Motorcycles ATVs and All Brake Systems
KWD 8
2PCS 1L Brake Bleeder Bottle with 20 Inch Tube and Rubber Connector, One Person Brake Bleeder Bottle Brake Bleeder Kit Suitable for Cars, Motorcycles ATVs and All Brake Systems
KWD 8


