- التسوق ، اصبح سهلا.
- /
- احصل على التطبيق!
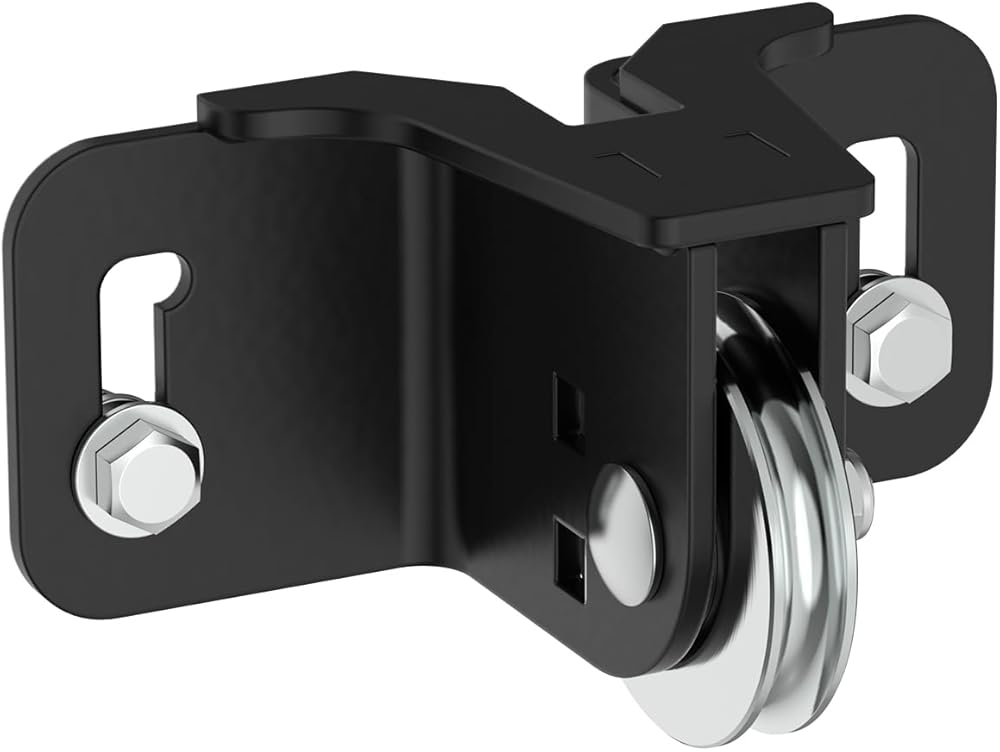
How to Installation the Steel Plow Pulley?
(Note: Make sure all the hardware needed to complete this mount is in the package before installation.)
1. Place cable over pulley and decide the best position is best for your winch.
2. Place cable over pulley and install to pulley bracket using the 1-1/2” carriage bolt, nylon spacers, nylon bushing and flange nut to pulley. Do not over tighten, the pulley must be able to rotate freely.
3. Loosely install 3/8” bolt, washer, lock washer, and nut through fair-lead bracket and pulley bracket. Slots have been cut into the brackets to adjust for clearance of plastic on the machine.
4. Once desired position is found, tighten down all nuts.
 Boao 6 مجموعات 6-10 قياس البطارية موصل سريع 50A 12-36V بطارية الاتصال السريع قطع البطارية سلك سريع التوصيل عدة البطارية موصل سريع قطع التوصيل لمقطورة ونش المحرك (الأحمر)
KWD 5
Boao 6 مجموعات 6-10 قياس البطارية موصل سريع 50A 12-36V بطارية الاتصال السريع قطع البطارية سلك سريع التوصيل عدة البطارية موصل سريع قطع التوصيل لمقطورة ونش المحرك (الأحمر)
KWD 5
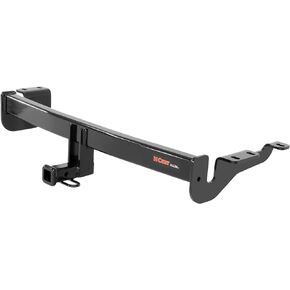 وصلة مقطورة CURT 11420 فئة 1، جهاز استقبال 1-1/4 بوصة، يناسب مجموعة مختارة من Toyota Corolla iM، Scion iM
KWD 84.500
وصلة مقطورة CURT 11420 فئة 1، جهاز استقبال 1-1/4 بوصة، يناسب مجموعة مختارة من Toyota Corolla iM، Scion iM
KWD 84.500
![مصابيح مقطورة مستديرة LINKITOM مقاس 4 بوصات، أحمر ساطع للغاية 24 مصباح LED لإشارة الانعطاف للفرامل مع حشوات مطاطية مقاومة للماء لشاحنة مقطورة القوارب RV [معتمدة من DOT] [IP67]، عبوتان in Kuwait](https://cdn1.tilga.com/md/prod/3/512/3/74491312.55327.jpg) مصابيح مقطورة مستديرة LINKITOM مقاس 4 بوصات، أحمر ساطع للغاية 24 مصباح LED لإشارة الانعطاف للفرامل مع حشوات مطاطية مقاومة للماء لشاحنة مقطورة القوارب RV [معتمدة من DOT] [IP67]، عبوتان
KWD 8.500
مصابيح مقطورة مستديرة LINKITOM مقاس 4 بوصات، أحمر ساطع للغاية 24 مصباح LED لإشارة الانعطاف للفرامل مع حشوات مطاطية مقاومة للماء لشاحنة مقطورة القوارب RV [معتمدة من DOT] [IP67]، عبوتان
KWD 8.500
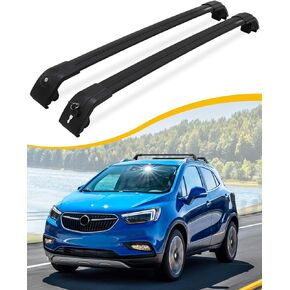 قضبان متقاطعة لحامل السقف مناسبة لـ Buick Encore 2013 2014 2015 2016 2017 2018 2019 2020 2021 2022 2023 شريط حمل الأمتعة قابل للقفل (مع سياج جانبي دافق)
KWD 40.500
قضبان متقاطعة لحامل السقف مناسبة لـ Buick Encore 2013 2014 2015 2016 2017 2018 2019 2020 2021 2022 2023 شريط حمل الأمتعة قابل للقفل (مع سياج جانبي دافق)
KWD 40.500