- Shopping, made easy.
- /
- Get the app!
Specification:
Categories: DIY decoration clothing stickers
Product type: Patches
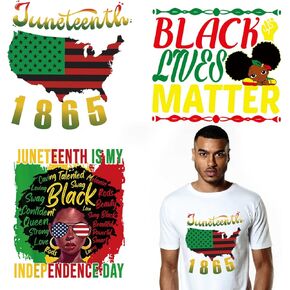
Pattern: Juneteenth style
Size: As the image shows
Application: T-shirts/ Baby&Kids Clothes/ Hoody/ Shipping Bags/ Schoolbags/ Curtain etc.
Here is a step-by-step guide on how to use heat transfer stickers:
1. Prepare Your Clothing: Choose the garment you want to apply the heat transfer sticker to and make sure it is clean and free of any wrinkles. Place a thin cloth or parchment paper on top of the garment to protect it during the application process.
2. Position the Sticker: Decide on the placement of the heat transfer sticker on your clothing. Once you have chosen the desired location, place the sticker with the design facing down onto the fabric. Make sure it is centered and aligned correctly.
3. Apply Heat: Use a heat press machine or a household iron set to the appropriate temperature (usually between 300-350°F). Apply firm pressure on the sticker for about 10-15 seconds, ensuring that the entire design is in contact with the fabric.
4. Peel Off the Transfer Paper: Allow the garment to cool down slightly before carefully peeling off the transfer paper. If the sticker does not seem well-adhered, repeat the heating process for a few more seconds.
5. Final Touches: Once the transfer paper is removed, your heat transfer sticker should be securely attached to the clothing. Give the garment a final press with the iron to ensure the design is fully set.
6. Enjoy Your Customized Clothing: Your clothing is now personalized with a unique heat transfer sticker design. Wear and enjoy your customized garment with pride!
7. Following these steps will help you successfully apply heat transfer stickers to your clothing for a fun and stylish look.
 3 Sheets Iron on Transfers Juneteenth Iron on Decals Juneteenth Theme Design Iron on Vinyl Stickers Juneteenth Vinyl Decals for Clothes Bag Pillow Covers DIY Black History Decoration Emancipation
KWD 4
3 Sheets Iron on Transfers Juneteenth Iron on Decals Juneteenth Theme Design Iron on Vinyl Stickers Juneteenth Vinyl Decals for Clothes Bag Pillow Covers DIY Black History Decoration Emancipation
KWD 4
 Juneteenth Iron on Heat Transfer Stickers Juneteenth Iron on Decals Black Women Iron on Patches Juneteenth Letter Emancipation Design Vinyl Appliques Sticker for t-Shirt Pillow Cover DIY Decorations
KWD 3.500
Juneteenth Iron on Heat Transfer Stickers Juneteenth Iron on Decals Black Women Iron on Patches Juneteenth Letter Emancipation Design Vinyl Appliques Sticker for t-Shirt Pillow Cover DIY Decorations
KWD 3.500
 MMvolesy 6Pc Indian South African Porcupine Quill 7-8 Inch
KWD 7.500
MMvolesy 6Pc Indian South African Porcupine Quill 7-8 Inch
KWD 7.500
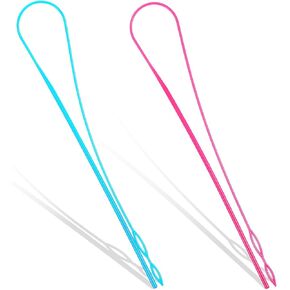 2Pcs Drawstring Threader, Plastic Flexible Hoodie String Threader 23 Inch Easy Threader Drawstring Replacement Tool for Jackets Swim Trunks Pants Sweatpants Shorts Hoodies
KWD 1.500
2Pcs Drawstring Threader, Plastic Flexible Hoodie String Threader 23 Inch Easy Threader Drawstring Replacement Tool for Jackets Swim Trunks Pants Sweatpants Shorts Hoodies
KWD 1.500


