- التسوق ، اصبح سهلا.
- /
- احصل على التطبيق!
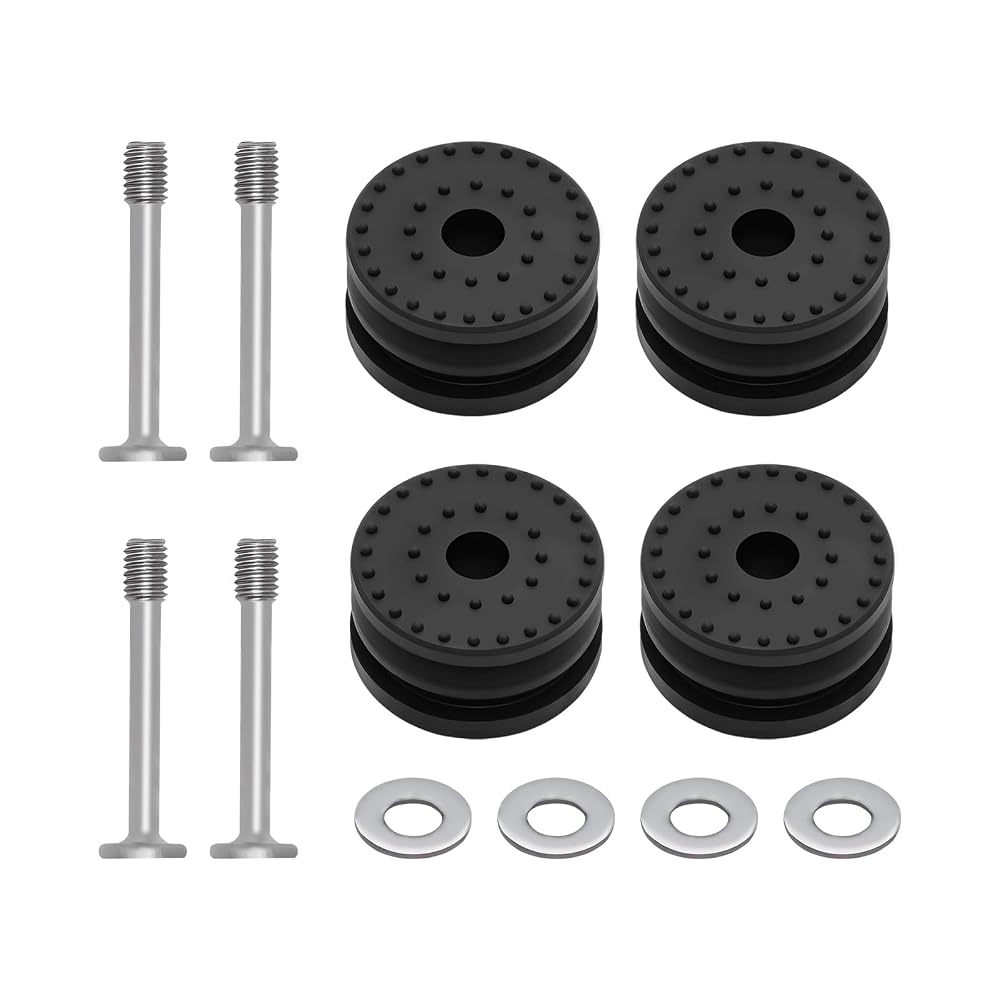
In the Box:
4 X Anti-Vibration Feet
4 X Screw
4 X Gasket
Functions of the H2D Anti-Vibration Feet:
The anti-vibration feet are installed at the bottom of the printer to reduce vibrations during the printing process. The anti-vibration feet are attached to the 4 corners of the printer's base using adhesive backing, secured with washers and screws.
Install The Anti-vibration Feet
1. Peel off the adhesive backing of the new feet
2. Thread the washers onto the screws , then insert the screws and washers into the feet
3. Pull the bottom of the screws by hand to secure the washers and screws into the feet
4. Align the screws with the holes, and install the feet and screws together, Press the feet firmly to adhere them to the ring, then use the hex key to tighten the fixing screws
After finish feet install, Place the printer flat on the table, ensuring it is stable and does not wobble
(NOTE: Given the printer's weight, it is recommended that two people work together to avoid potential damage)
 مروحة تبريد Hotend لـ Bambu Lab X1 Series ، مروحة تبريد مزدوجة تحمل الكرة 2510 5V لـ Bambu Lab X1/X1C/X1E 3D Printer
KWD 5
مروحة تبريد Hotend لـ Bambu Lab X1 Series ، مروحة تبريد مزدوجة تحمل الكرة 2510 5V لـ Bambu Lab X1/X1C/X1E 3D Printer
KWD 5
 P1S P1P Hotend Kit ، رأس الطباعة الساخن الكامل للتجميع الساخن مع سخان من السيراميك ، الثرمستور ، مروحة التبريد ، فوهة فولاذية صلبة 0.4 مم ، استبدال Hotend لـ Bambu Lab P1 Printer
KWD 13.500
P1S P1P Hotend Kit ، رأس الطباعة الساخن الكامل للتجميع الساخن مع سخان من السيراميك ، الثرمستور ، مروحة التبريد ، فوهة فولاذية صلبة 0.4 مم ، استبدال Hotend لـ Bambu Lab P1 Printer
KWD 13.500
 2pcs Kobra 3 Max Moaszle 0.4mm ، فوهة فولاذية متصلبة سريعة التبادل الصلب عالي التدفق عالي السرعة فوهة رذاذ النهاية الساخنة لـ anycubic Kobra 3 Max 3D Printer
KWD 0
2pcs Kobra 3 Max Moaszle 0.4mm ، فوهة فولاذية متصلبة سريعة التبادل الصلب عالي التدفق عالي السرعة فوهة رذاذ النهاية الساخنة لـ anycubic Kobra 3 Max 3D Printer
KWD 0
 78.74 بوصة 6 دبوس AMS محور كبل تمديد لـ Bambu Lab P1P/P1S/X1C/X1/X1E 3D ، 22AWG High Purity Copper Wire مع مرشح حلقة مغناطيسية
KWD 0
78.74 بوصة 6 دبوس AMS محور كبل تمديد لـ Bambu Lab P1P/P1S/X1C/X1/X1E 3D ، 22AWG High Purity Copper Wire مع مرشح حلقة مغناطيسية
KWD 0