- التسوق ، اصبح سهلا.
- /
- احصل على التطبيق!
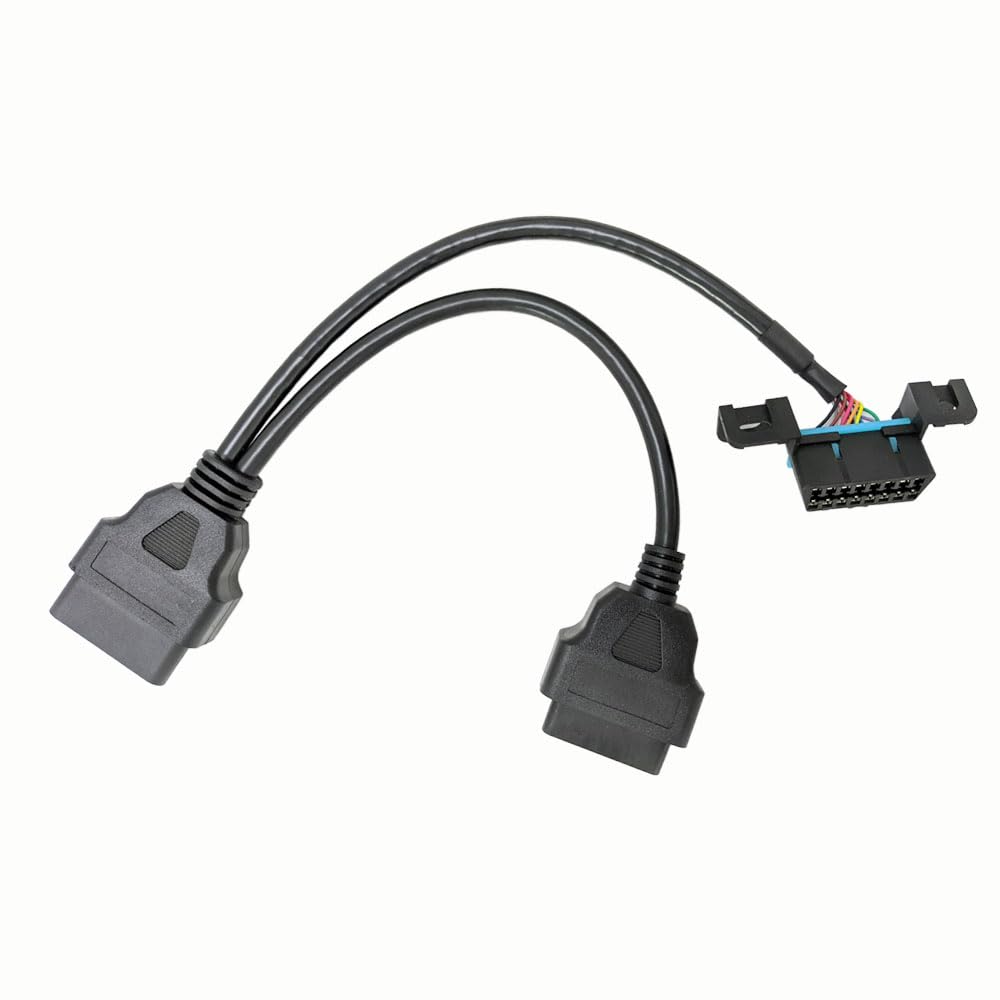
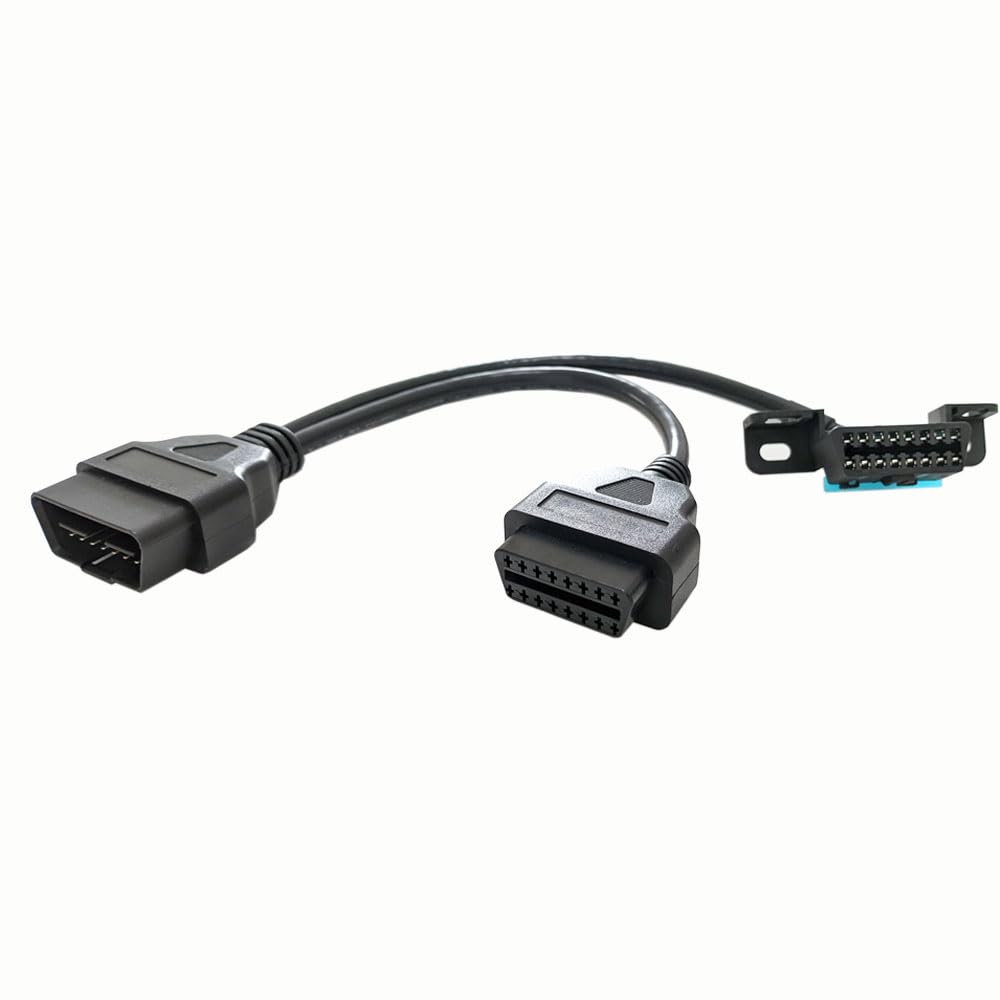
Spec:
Connector: Nickel plated
Conductor: Pure copper
AWG: 24&26
Temperature: -20℃ to 90℃(-4 ℉ to 194 ℉)
Jacket: PVC, black
Voltage: 12V/24V
Current:3A max
Length: 0.3m/11.81 inch
How to install?
1. Locate the OBD-II port: The OBD-II port is usually located under the dashboard on the driver's side of the vehicle. It's a standardized diagnostic port and can be found in various positions depending on the make and model of your vehicle. Refer to your vehicle's manual if you have trouble finding it.
2. Ensure the ignition is off: Before connecting any cables, make sure your vehicle's ignition is turned off. This is for safety reasons and to prevent any electrical issues during the installation process.
3. Connect the OBD Y cable: Take the male end of the OBD Y cable and insert it into the OBD-II port of your vehicle. Ensure it fits securely.
4. Connect other devices: Now, you have two female OBD-II connectors available on the other end of the Y cable. You can connect your desired OBD-II devices to these connectors. For example, if you have a scan tool and a GPS tracker that both require access to the OBD-II port, you can connect them simultaneously using the Y cable.
5. Secure the cables: Once all the connections are made, ensure that the cables are properly routed and secured to prevent them from dangling or interfering with your driving.
6. Test the connections: With everything connected, turn on your vehicle's ignition and test each device to ensure they are working correctly. For example, if you connected a scan tool, check if it can communicate with the vehicle's onboard computer and retrieve diagnostic information.
 رير ماستر كيبل طاقة شامل او بي دي لكاميرا التابلت، مراقبة 24 ساعة / وضع التحكم التلقائي مع زر التبديل (منفذ مايكرو يو اس بي)
KWD 6.500
رير ماستر كيبل طاقة شامل او بي دي لكاميرا التابلت، مراقبة 24 ساعة / وضع التحكم التلقائي مع زر التبديل (منفذ مايكرو يو اس بي)
KWD 6.500
 رير ماستر كيبل طاقة عالمي OBD لكاميرا لوحة القيادة، مراقبة لمدة 24 ساعة مع زر تبديل الوضع (ميني يو اس بي)
KWD 6.500
رير ماستر كيبل طاقة عالمي OBD لكاميرا لوحة القيادة، مراقبة لمدة 24 ساعة مع زر تبديل الوضع (ميني يو اس بي)
KWD 6.500
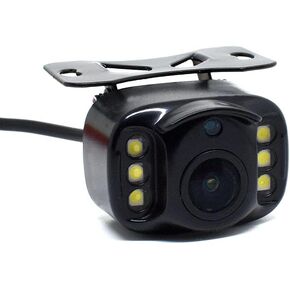 REARMASTER® كاميرا احتياطية جديدة للمركبة، 6 مصابيح LED للرؤية الليلية، صورة واضحة عالية الوضوح
KWD 9.500
REARMASTER® كاميرا احتياطية جديدة للمركبة، 6 مصابيح LED للرؤية الليلية، صورة واضحة عالية الوضوح
KWD 9.500
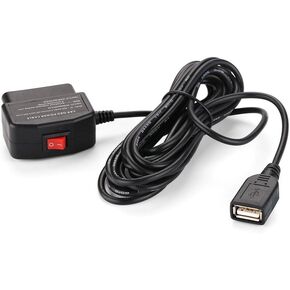 رير ماستر كيبل طاقة عالمي او بي دي لكاميرا التابلوه، مراقبة لمدة 24 ساعة مع زر تبديل الوضع (يو اس بي)
KWD 6.500
رير ماستر كيبل طاقة عالمي او بي دي لكاميرا التابلوه، مراقبة لمدة 24 ساعة مع زر تبديل الوضع (يو اس بي)
KWD 6.500