- التسوق ، اصبح سهلا.
- /
- احصل على التطبيق!
QIEOTE Transparent Push Pin Clips
Your reliable solution for organizing, displaying, and hanging photos, notes, and artworks in office, home, and school! As a brand focused on practical, durable accessories, QIEOTE crafts items that simplify daily tasks, and these 30pcs clear push pin clips embody that commitment, merging functionality with a sleek transparent design to elevate your space.
These push pin clips stand out with a strong spring for secure grip, ensuring your photos, notes, or artworks stay in place without slipping. Made of high-quality plastic, they're sturdy and long-lasting, while the proper size (1 inch long, 0.5 inches wide) makes them easy to handle – perfect as clear thumb tacks, cork board pins, or bulletin board pins. The transparent design lets them blend seamlessly with any background, keeping your bulletin board or wall looking neat and uncluttered.
Versatile for countless scenarios: Use them as wall tacks or push pins for wall to display family photos at home, as push pin clothes pins for classroom bulletin boards to showcase student art, or as hanging clips in the office to pin important memos. They work on cork boards, bulletin boards, cardboard, foam boards, and more – ideal for teachers, office workers, and homeowners alike.
Product Specifications: 30 pieces total, transparent color, made of plastic, each clip measures 1 inch long and 0.5 inches wide, features a strong spring mechanism.
Note: Designed for soft surfaces (cork, bulletin, foam, cardboard); do not use on hard surfaces (concrete, metal) as tacks may not penetrate or could cause damage. Keep away from young children to prevent injury from the sharp tack end.
How to Use
Follow these simple steps to use the push pin clip safely and effectively:
Step 1: Prepare the Surface
Ensure the target surface (e.g., corkboard, bulletin board) is clean, dry, and free of dust or debris. Soft, porous surfaces work best—avoid using the push pin clip on hard surfaces like glass, metal, or solid wood, as this may damage the surface or cause the clip to loosen.
Step 2: Load the Item
Gently open the metal clip on top of the push pin. Place your item (e.g., a photo, note, or small artwork) between the two clip jaws. Release the clip slowly to ensure the item is held tightly—do not force the clip open too wide, as this may bend or damage the metal.
Step 3: Secure to the Surface
Hold the push pin clip by the top clip (not the sharp pin end) to avoid pricking your fingers. Align the clip with your desired position on the surface. Apply gentle, even pressure to the top of the clip to push the sharp pin into the surface. Stop once the pin is fully inserted (the base of the pin should touch the surface) to prevent over-penetration, which may damage the surface or weaken the clip's hold.
Step 4: Adjust or Remove (If Needed)
To reposition the clip: Gently pull the clip upward to remove the pin from the surface, then repeat Steps 2–3 in the new position.
To remove the item: Open the clip slightly and slide the item out—do not pull the item forcefully, as this may tear thin paper (e.g., notes or photos).
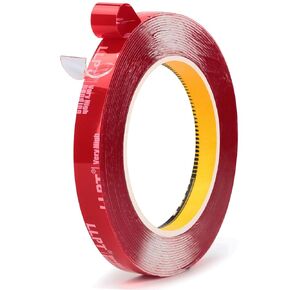 شريط تثبيت مقاوم للماء مزدوج الجوانب من LLPT، مقاس 0.5 بوصة × 18 قدم، إطار صور لاصق على الوجهين، شرائط تعليق لصندوق أظافر ديكو للمنزل والملصقات (G491013mm)
KWD 6.500
شريط تثبيت مقاوم للماء مزدوج الجوانب من LLPT، مقاس 0.5 بوصة × 18 قدم، إطار صور لاصق على الوجهين، شرائط تعليق لصندوق أظافر ديكو للمنزل والملصقات (G491013mm)
KWD 6.500
 مشابك ربط كبيرة جدًا مقاس 2.4 بوصة (48 حزمة)، ترقية مشابك ربط كبيرة ومشابك ورق ضخمة، مشابك كبيرة شديدة التحمل للوازم المكتب والمنزل، أسود
KWD 11
مشابك ربط كبيرة جدًا مقاس 2.4 بوصة (48 حزمة)، ترقية مشابك ربط كبيرة ومشابك ورق ضخمة، مشابك كبيرة شديدة التحمل للوازم المكتب والمنزل، أسود
KWD 11
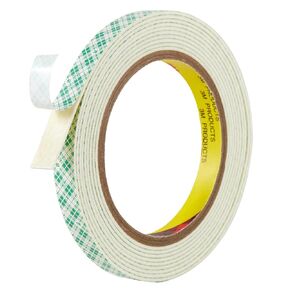 شريط إسفنجي يوريتان مطلي بطبقة مزدوجة 3M 4026، شريط إسفنجي مزدوج الجوانب 3M عالي التحمل للربط، تركيب لوحات أسماء اللافتات الداخلية، بطاقة DIY 0.5 بوصة × 10 قدم، 1 لفة
KWD 3
شريط إسفنجي يوريتان مطلي بطبقة مزدوجة 3M 4026، شريط إسفنجي مزدوج الجوانب 3M عالي التحمل للربط، تركيب لوحات أسماء اللافتات الداخلية، بطاقة DIY 0.5 بوصة × 10 قدم، 1 لفة
KWD 3
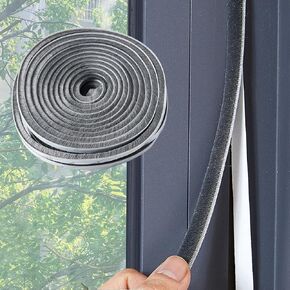 33 قدمًا رماديًا عزلًا ذاتيًا ، يتم تجريد الطقس للأبواب وفرشاة تجريد الطقس للنوافذ لنوافذ/أبواب إطار SID 0.35 "عريض × 0.2" (5 ملم)
KWD 4
33 قدمًا رماديًا عزلًا ذاتيًا ، يتم تجريد الطقس للأبواب وفرشاة تجريد الطقس للنوافذ لنوافذ/أبواب إطار SID 0.35 "عريض × 0.2" (5 ملم)
KWD 4


