- التسوق ، اصبح سهلا.
- /
- احصل على التطبيق!
Specification:
Item Type: For Steam Deck SSD Heatsink Thermal Pad
Material: Copper, Silicone
Heat Dissipation Copper Sheet Size: Approx. 26 x 23 x 0.5mm / 1.02 x 0.91 x 0.02in
Compatible Brands: For Steam Deck, For ROG ALL
Applicable Hard Disk: M.2 2230 NVME SSD
How to Use:
Hard Disk Cooling Installation Tutorial:
1. Turn off the for STEAM DECK. Before replacing the hard disk, turn off the for STEAM DECK and unplug all cables.
2. Remove the eight screws on the back of the for STEAM DECK. (1) Use a tool to unscrew the eight screws securing the back cover. Four 9.5mm / 0.37in screws and four 5.8mm / 0.23in screws. (2) Keep the screws during replacement to prevent loss.
3. Pry off the rear cover. (1) Insert a tab along the edge of the right‑hand handle into the Space between the back cover and the front housing. (2) Use the tab to pry up the rear cover and release the tab.
4. Remove the protective plate. (1) Use a tool to unscrew the three screws securing the Guard, one 3.4mm / 0.13in screw and two 3.7mm / 0.15in screws. (2) Remove the screws and detach the Guard.
5. Remove the SSD. (1) Use a tool to unscrew the screws securing the SSD. (2) Remove the fixing screws and pull out the hard disk.
6. Install the heat sink (1) Peel off the heat sink protective film. (2) Tear off the protective film of the thermal paste and stick the thermal paste on the facade of the hard disk particles as shown in the picture. (3) Align the heat sink with the hard disk and press it into the thermal slot.
7. Install the SSD. Reinsert the SSD with the heat sink installed into the slot and tighten the screws
PackageList:
1 x Copper Heat Sink
2 x Phase Change Thermal Pad
3 x Silicon Thermal Pad
1 xDevice
1 x Open Pry Bar
1 x Triangle Pry Tool
18 x Screw
1 x Storage Box
Notice:
Please allow some error due to manual measurement.
 6384 120KV فرش السيارات، 24V-36V للماء عالية الطاقة DC فرش السيارات للدراجات الكهربائية
KWD 32
6384 120KV فرش السيارات، 24V-36V للماء عالية الطاقة DC فرش السيارات للدراجات الكهربائية
KWD 32
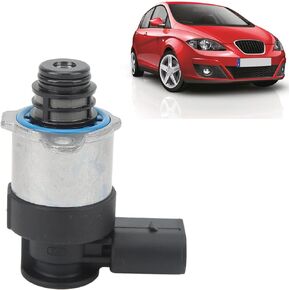 1462C00987 منظم مضخة ضغط الوقود، قوي عالي الدقة صمام التحكم في منظم ضغط مضخة الوقود، سهل التركيب وثابت مقاوم للصدأ، استبدال ملحقات السيارة لـ A3 A4 A5
KWD 11
1462C00987 منظم مضخة ضغط الوقود، قوي عالي الدقة صمام التحكم في منظم ضغط مضخة الوقود، سهل التركيب وثابت مقاوم للصدأ، استبدال ملحقات السيارة لـ A3 A4 A5
KWD 11
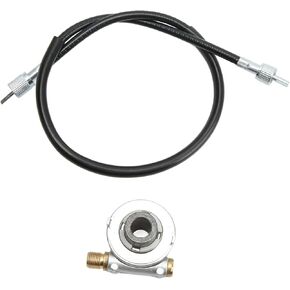 ترس عداد السرعة 12 مم، كابل عداد السرعة أداء دائم تصنيع متقن للدراجات النارية
KWD 2.500
ترس عداد السرعة 12 مم، كابل عداد السرعة أداء دائم تصنيع متقن للدراجات النارية
KWD 2.500
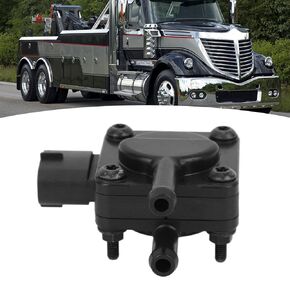 مستشعر الضغط الإيجابي DPF، مستشعر ضغط الغاز الإيجابي 3626432C1، مستشعر الضغط التفاضلي سهل التركيب والأداء المستقر، بديل للحد الأقصى
KWD 11.500
مستشعر الضغط الإيجابي DPF، مستشعر ضغط الغاز الإيجابي 3626432C1، مستشعر الضغط التفاضلي سهل التركيب والأداء المستقر، بديل للحد الأقصى
KWD 11.500


