- التسوق ، اصبح سهلا.
- /
- احصل على التطبيق!
🛠️ Installation Instructions:
Quick and Easy DIY Installation in 7 Simple Steps
1. Prepare Your Tools
Start by gathering the basic tools you'll need, including a screwdriver, wrench, and potentially plastic trim removal tools to avoid damaging your vehicle's components.
2. Remove the Wiper Arm
Use a wrench to loosen the nut securing the wiper arm. Once loose, carefully lift the arm off the windshield. Be cautious to prevent the arm from falling back and possibly damaging the windshield.
3. Remove the Old End Cap
Depending on your vehicle model, the end cap may be secured with screws, snap clips, or a combination of both. Use a screwdriver to remove the screws or use a plastic trim tool to gently release the clips. Pay attention to how the end cap is installed so you can correctly install the new one. Don't forget to keep the screws and clips safe for reinstallation.
4. Clean the Installation Area
After removing the old end cap, clean the mounting area thoroughly. Use a clean cloth or brush to remove dust, debris, and any leftover sealant. A clean, smooth surface ensures the new end cap fits perfectly and seals properly.
5. Install the New End Cap
Align the new end cap with the mounting area and secure it in place. If it's held by screws, tighten them securely—but avoid over-tightening to prevent damage to the cap or your vehicle. If it's secured with clips, ensure they snap in firmly.
6. Reattach the Wiper Arm
Position the wiper arm back onto its original spot, then tighten the retaining nut. Check the arm's position and ensure it moves freely without obstruction.
7. Check the Seal & Functionality
After installation, check the seal between the end cap and the vehicle to ensure there are no gaps or looseness. You can test the drainage by spraying water over the windshield to ensure it flows smoothly. Also, activate the wiper to check that it functions properly without interference from the end cap.
Pro Tip:
"Take a quick photo of the old end cap before removal. It can help you align the new cap more easily during installation!"
 شبكة سيارة من ماكس هول، مقاس 46 انش× 36 انش× 4-1/2 انش، بسعة 150 باوند سعة شبكة سقف السيارة من الستيل 70115 غير مجمعة 150 باوند
KWD 47
شبكة سيارة من ماكس هول، مقاس 46 انش× 36 انش× 4-1/2 انش، بسعة 150 باوند سعة شبكة سقف السيارة من الستيل 70115 غير مجمعة 150 باوند
KWD 47
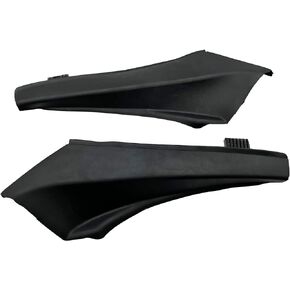 لتويوتا 2013-2018 Rav4 الجبهة LH و RH الحاجز إلى القلنسوة هود الجانب ختم تمديد الكسوة ممسحة زجاج أمامي غطاء لوحة الحاجز
KWD 8
لتويوتا 2013-2018 Rav4 الجبهة LH و RH الحاجز إلى القلنسوة هود الجانب ختم تمديد الكسوة ممسحة زجاج أمامي غطاء لوحة الحاجز
KWD 8
 15914995 مقبض مزلاج صندوق القفازات متوافق مع 2007-2013 تشيفي سيلفرادو جي إم سي سييرا 1500 2500 3500 مقبض مزلاج باب مقصورة القفاز العلوي
KWD 4.500
15914995 مقبض مزلاج صندوق القفازات متوافق مع 2007-2013 تشيفي سيلفرادو جي إم سي سييرا 1500 2500 3500 مقبض مزلاج باب مقصورة القفاز العلوي
KWD 4.500
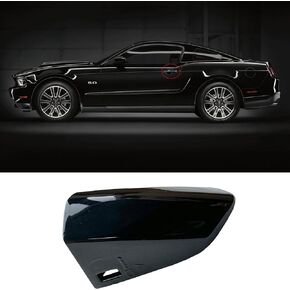 غطاء غطاء مقبض الباب الأسود من جانب السائق متوافق مع Ford Mustang 2015-2020 استبدال FR3Z-63218A15-ACPTM FR3Z-63218A15-AAPTM
KWD 4.500
غطاء غطاء مقبض الباب الأسود من جانب السائق متوافق مع Ford Mustang 2015-2020 استبدال FR3Z-63218A15-ACPTM FR3Z-63218A15-AAPTM
KWD 4.500


