- التسوق ، اصبح سهلا.
- /
- احصل على التطبيق!
VALVE CORE REMOVAL: 1. Turn Valve Lever in the direction of flow so the shaft can go through the body. 2. Connect the valve core to the service port of the system. 3. Push the shaft towards the service port. Slowly and carefully rotate the shaft until the tip of the shaft engages the body of the valve core. 4. Rotate the shaft counter-clockwise by turning the shaft knob. (WARNING: MAKE SURE THE SHAFT CONNECTION NUT DOES NOT START TO TURN AS YOU ARE TURNING THE SHAFT. THIS COULD CAUSE THE SHAFT CONNECTION NUT TO LOOSEN AND REFRIGERANT WOULD LEAK OUT!) 5. Continue rotating the shaft knob until you cannot turn the shaft anymore. DO NOT FORCE! 6. With the shaft pulled out all the way, CLOSE THE VALVE. (Valve Lever perpendicular to the direction of FLOW) (WARNING: FAILURE TO CLOSE VALVE COULD CAUSE INJURY AND WOULD RESULT IN A LOSS OF REFRIGERANT!) 7. Loosen and remove the shaft connection nut from the valve body. 8. Remove the damaged valve core.VALVE CORE INSTALLATION:1. Insert the new valve core onto the tip of the shaft. 2. Tighten the shaft connection nut to the valve body. 3. Turn Valve Lever in the direction of flow so the shaft can go through the body. 4. Turn the shaft clockwise until the valve core is installed completely. 5. Once the valve core is in place, pull the shaft back and close the valve. 6. Remove the shaft from the valve body. 7. SLOWLY open the valve knob to assure the valve core is in place. If the valve is in place, the pressure in the tool will dissipate quickly. If the valve core is not in place, quickly close the valve and try again.
 -6%
4 قطع 6.5 انش RGB LED مكبر صوت السيارة مجموعة مصابيح زخرفية حلقة ضوء فاصل حلقة ضوء بلوتوث تحكم التطبيق
KWD 34
-6%
4 قطع 6.5 انش RGB LED مكبر صوت السيارة مجموعة مصابيح زخرفية حلقة ضوء فاصل حلقة ضوء بلوتوث تحكم التطبيق
KWD 34
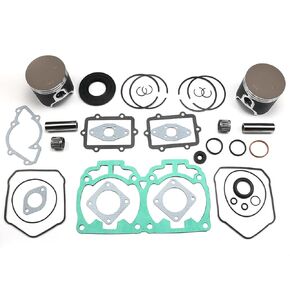 مجموعة إعادة بناء الطرف العلوي محامل المكابس ذات الحلقة المزدوجة لـ Ski-Doo MXZ 800 2000-2007
KWD 68
مجموعة إعادة بناء الطرف العلوي محامل المكابس ذات الحلقة المزدوجة لـ Ski-Doo MXZ 800 2000-2007
KWD 68
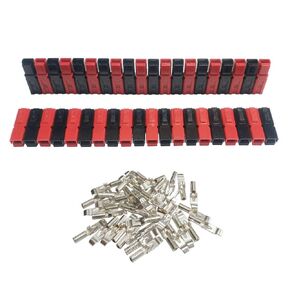 موصلات بطارية الطاقة 30 أمبير، قابس موصل كهربائي 30 أمبير، 20 زوجًا
KWD 6.500
موصلات بطارية الطاقة 30 أمبير، قابس موصل كهربائي 30 أمبير، 20 زوجًا
KWD 6.500
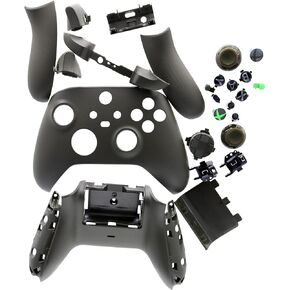 مجموعة غطاء غطاء Deal4GO مع مصد الزناد والأزرار، بديل إصلاح كامل لوحدة التحكم اللاسلكية Xbox Series X & S 1914 (مموه أخضر)
KWD 7
مجموعة غطاء غطاء Deal4GO مع مصد الزناد والأزرار، بديل إصلاح كامل لوحدة التحكم اللاسلكية Xbox Series X & S 1914 (مموه أخضر)
KWD 7


