- التسوق ، اصبح سهلا.
- /
- احصل على التطبيق!
Installation Instructions
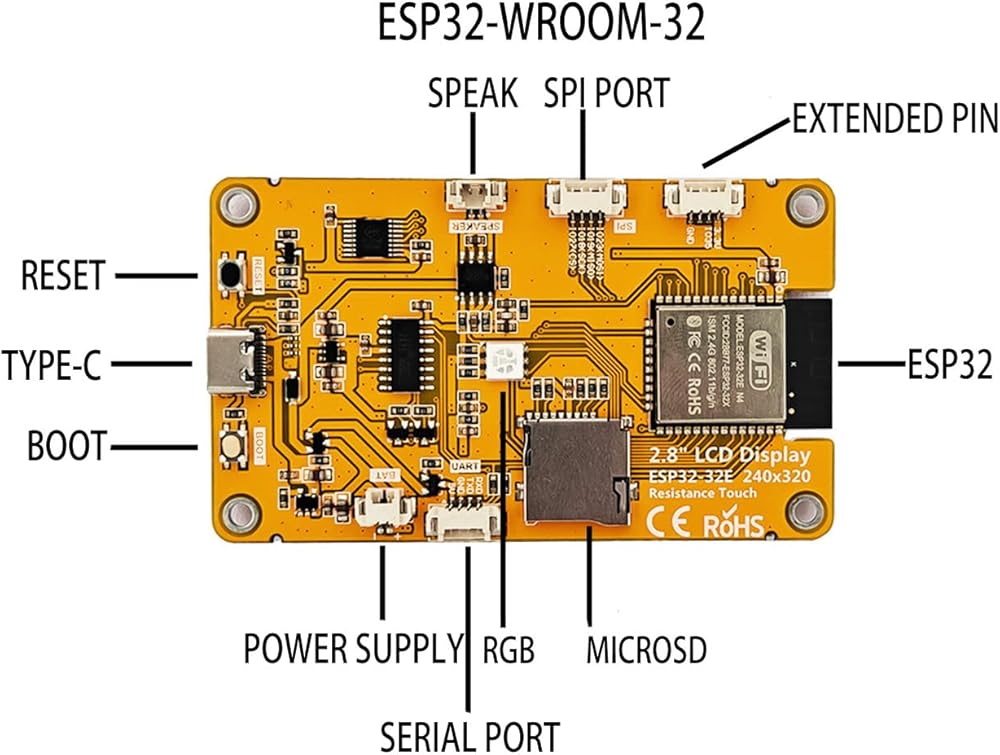
1. Preparation: Verify components including the ESP32 CYD (with display), front and rear acrylic shells, and 4 sets of screws and nuts; prepare a small Phillips screwdriver with a head diameter ≤2mm; gently peel off the protective film from the acrylic shells and have clean paper towels ready to wipe away fingerprints.
2. Align the front shell: Pinch the edges of the ESP32 screen and align the front shell with the screen cutout, ensuring the motherboard screw holes are fully visible through the shell holes. Initial front shell positioning: Insert a screw into one aligned hole and use a screwdriver to turn the nut two turns to secure the position (do not tighten). Repeat this for the remaining three holes.
3. Flip the device: Grasp the edges of the device (do not press the screen), slowly flip it so the motherboard faces upward, and place it steadily on the table. Align the back cover: Position the back cover with the motherboard groove over the screw heads on the motherboard side, then gently press to snap the groove onto the motherboard edges. Securing the Back Cover: Insert a screw into one hole on the back cover. Gently tighten the screwdriver until slight resistance is felt, then stop (do not overtighten). Repeat this process for the remaining three holes.
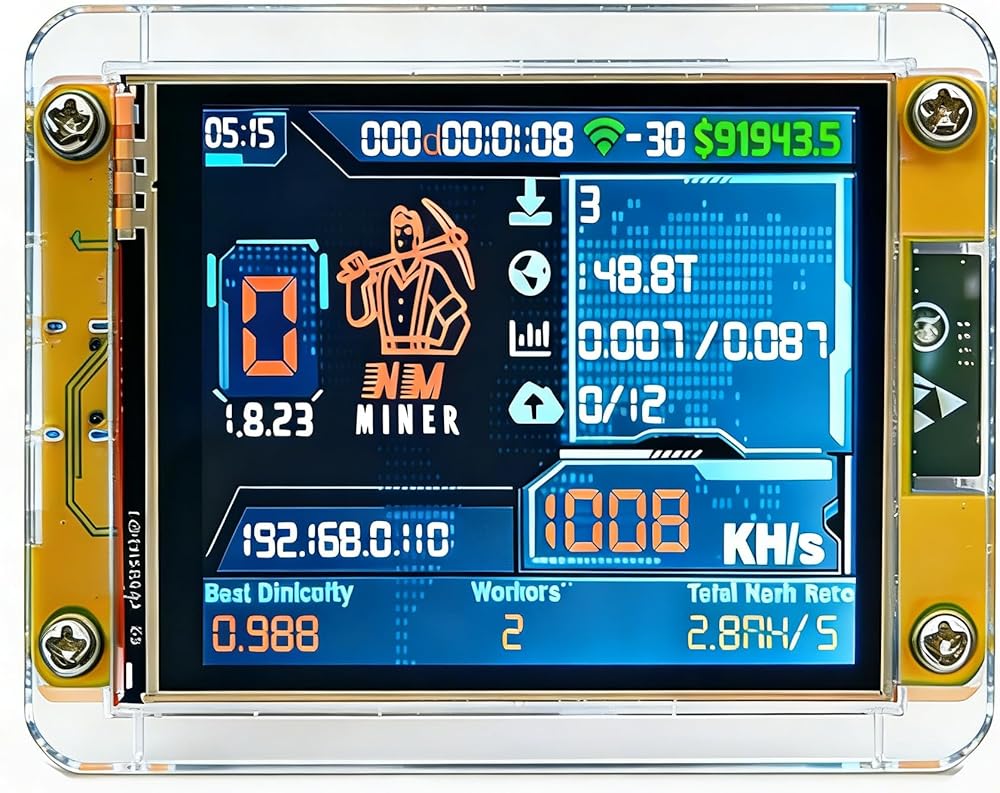
4. Inspection Complete: Gently shake the device to confirm the casing is securely fastened to the motherboard and the screen is free of obstructions.
 -15%
Bitaxe Gamma - Solo Satoshi | صنع في الولايات المتحدة | إمدادات الطاقة والموقف بما في ذلك. | ~ 1.2th/s @ ~ 18W | Wi-Fi | توصيل وتشغيل عمال عمال عملة البيتكوين.
KWD 45.500
-15%
Bitaxe Gamma - Solo Satoshi | صنع في الولايات المتحدة | إمدادات الطاقة والموقف بما في ذلك. | ~ 1.2th/s @ ~ 18W | Wi-Fi | توصيل وتشغيل عمال عمال عملة البيتكوين.
KWD 45.500
 Raspberry Pi AI Hat+ 26 قمم
KWD 63.500
Raspberry Pi AI Hat+ 26 قمم
KWD 63.500
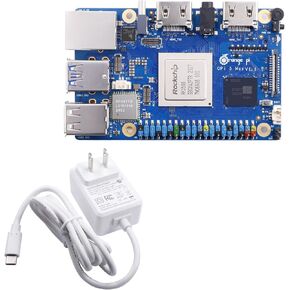 Orange PI 5 MAX 16GB RAM LPDDR5 ROCKCHIP RK3588 Development Board ، 8K Video Decoding 2.4GHz التردد M.2 PCIE 2.5G LAN WI-FI 6E+BT 5.3/BLE ORANG
KWD 66
Orange PI 5 MAX 16GB RAM LPDDR5 ROCKCHIP RK3588 Development Board ، 8K Video Decoding 2.4GHz التردد M.2 PCIE 2.5G LAN WI-FI 6E+BT 5.3/BLE ORANG
KWD 66
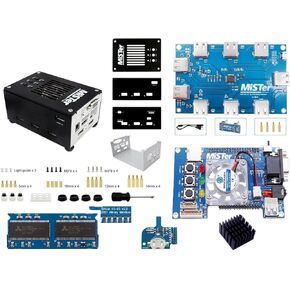 Mister FPGA Metal Case + 128MB SDRAM + IO VGA + HUB + FAN لـ TERASIC DE10-NANO
KWD 69.500
Mister FPGA Metal Case + 128MB SDRAM + IO VGA + HUB + FAN لـ TERASIC DE10-NANO
KWD 69.500