- التسوق ، اصبح سهلا.
- /
- احصل على التطبيق!
Operation instructions for digital tube display of CNC power supply
1. Turn on or off output: Short press the ON/OFF button in any state to turn on or off the output, cycling in sequence. When turning off the output, the digital display below will show an "OFF" indicator.
2. Set output voltage and current: Short press the SET button, and the digital display will start flashing. Short press the "+" or "" button to increase or decrease the output value, and then short press the SET button again to switch between "0.01V ->0.1V ->1V ->0.001A ->0.01A ->0.1A ->1A ->Exit Adjustment". During the adjustment process, if there is no operation on the button within 6 seconds, the adjustment will automatically exit.
3. Switching input/output display: In the non output voltage and current setting state, short press the "IN" or "OUT" key to switch between displaying input voltage and output voltage. When the input voltage is displayed, the "IN" indicator light will light up simultaneously, indicating the output voltage, and the "IN" indicator light will turn off.
4. CC and CV indicators: When the module operates in a constant voltage or constant current state, the CC and CV indicator lights will light up accordingly to indicate the CC and CV status
5. Zero point calibration of output current display: In the no-load state, hold down the SET button and do not release it Turn on the power and perform zero point calibration on the output current display. Once the calibration is complete, the calibration process will automatically exit. Simply release the SET button.
6. Set automatic data storage: During the key operation process, the digital display status, output voltage and current setting data, and switch output status will be automatically stored in memory, and will work in the stored state by default when powered on next time

 مستشعر خريطة الضغط المطلق المنوع HiSport 39300-2B000 متوافق مع كيا هيونداي أكسنت أزيرا إيكوس جينيسيس سوناتا توسان سانتي في كادينزا فورتي أوبتيما ريو روندو سورينتو سول سبورتاج
KWD 4
مستشعر خريطة الضغط المطلق المنوع HiSport 39300-2B000 متوافق مع كيا هيونداي أكسنت أزيرا إيكوس جينيسيس سوناتا توسان سانتي في كادينزا فورتي أوبتيما ريو روندو سورينتو سول سبورتاج
KWD 4
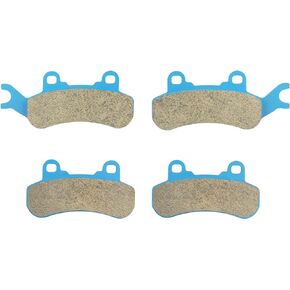 مكابح أمامية وخلفية ملبدة لـ CAN-AM Maverick X3 Turbo Sport Trail 1000 1000R DPS Xmr Xrc 2017 2018 2019 2020 2021 715900379, 715900386, 715900380, 715900387-2 Set
KWD 7
مكابح أمامية وخلفية ملبدة لـ CAN-AM Maverick X3 Turbo Sport Trail 1000 1000R DPS Xmr Xrc 2017 2018 2019 2020 2021 715900379, 715900386, 715900380, 715900387-2 Set
KWD 7
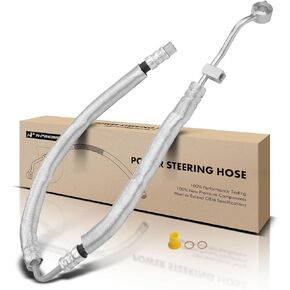 مجموعة خرطوم خط الضغط لخرطوم التوجيه المعزز A-Premium المتوافقة مع Hyundai Sonata 2006-2010 V6 3.3L من المضخة
KWD 22.500
مجموعة خرطوم خط الضغط لخرطوم التوجيه المعزز A-Premium المتوافقة مع Hyundai Sonata 2006-2010 V6 3.3L من المضخة
KWD 22.500
 3PCS USB إلى TTL UART CH340G المحول التسلسلي ، 3.3V/5V قابل للتبديل لبرمجة متحكم ، متوافق مع وحدات لوحة فرشاة STC
KWD 4
3PCS USB إلى TTL UART CH340G المحول التسلسلي ، 3.3V/5V قابل للتبديل لبرمجة متحكم ، متوافق مع وحدات لوحة فرشاة STC
KWD 4


