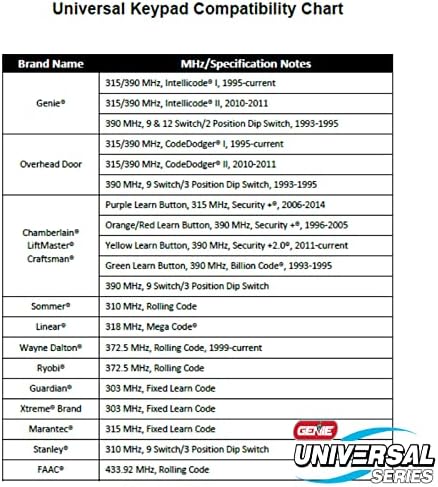
لوحة مفاتيح الدخول اللاسلكية العالمية Genie GUK-BX - 41249R، Genie، Ryobi، Chamberlain، LiftMaster، Craftsman، Marantec، Linear، Stanley، Wayne Dalton، وغيرها الكثير.
الاجهزه الالكترونيات الامريكية قد تحتاج الى محمول فولت من ١١٠ الى ٢٢٠.قد تحتاج إلى محول كهرباء
مميزات خاصة
Operate up to three different garage door openers or receivers from the most popular manufacturers in the industry!
Compatible with rolling code and fixed code dip switch products manufactured since 1993 with working safety sensors.
LEDs light and tones sound to let you know a button has been properly pressed.
Simplified programming allows for easy setup.
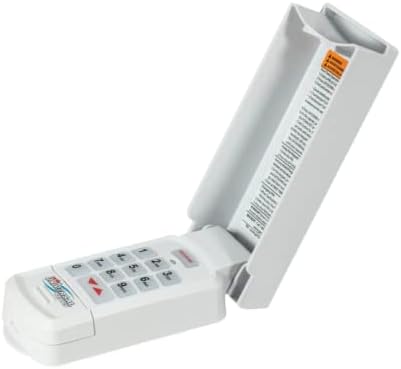
Installs in minutes! The keypad mounts to your garage door frame.
Ability to set a temporary PIN for neighbors or service workers that can easily be removed.
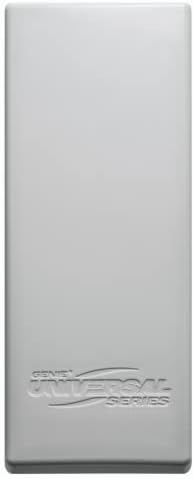
Simple and sleek cover design.
Dimensions = 6"L x 2-3/8"W x 1-5/16"H
Includes Universal Keypad, 2 x AAA batteries, mounting screws, and programming instructions.
An audible beep will sound with every key pressed.
Keypad will operate up to 3 doors with one PIN number.
A temporary PIN can be set for convenient non user access.
Do not press the LEARN button for longer than the noted 2-3 seconds as it could cause the operational remotes to no longer work.
Locate the brand and opener/receiver specifications for the device by consulting the label on the opener/receiver, the instructions manual, the current remote controls for the opener, or the original manufacturer or the opener/receiver.
Find the LEARN/PROGRAM button on the device - shape, color or name of this button could vary by brand. For garage door openers, be sure to check under the light covers. For commercial openers, this button may be on the circuit board or the opener. In some cases, this button could also be on an external receiver that is mounted on or nearby the product. Consult the devices manual if needed.
Remove activation tab from inside battery compartment.
Press both the PROGRAM & UP/DOWN keys at the same time and hold for 5 seconds. (tone will sound) - then release (green LED will flash and go out).
The keypad is now ready to be programmed. Start at STEP 3.
On the keypad, enter a personal PIN (3-8 digits)
On the keypad, press and release the UP/DOWN key (LED flashes slowly).
On the keypad, enter the ID# of the opener from Chart A.
On the keypad, press and release the UP/DOWN key (LED flashes rapidly).
On the opener, press the LEARN/PROGRAM button for 2-3 seconds and then release.
On the keypad, press the UP/DOWN key once every two seconds until the opener operates. DO NOT press any additional buttons until the opener stops running
WAIT until backlighting is out before attempting additional keypad entries. Programming is complete
On keypad, enter personal PIN (3-8 digits).
On keypad, press and release UP/DOWN key (LED flashes slowly).
On keypad, enter the ID#: 4
On keypad, press and release UP/DOWN key (LED flashes rapidly).
Then press and hold down UP/DOWN key.
Release button after tone sounds (5 sec).
On opener, press LEARN/PROGRAM button 2-3 seconds and then release.
On keypad, press UP/DOWN key ONE time. Opener will click.
On opener, press LEARN/PROGRAM button 2-3 seconds again and then release.
On keypad, press UP/DOWN key again ONE time. Opener will click.
On keypad, press UP/DOWN key again ONE time. Opener will operate.
WAIT until backlighting is out before attempting additional keypad entries. Programming is complete.
. With keypad backlighting off, press the PROGRAM button 2 times to program a second opener OR press it 3 times to program a third opener (blue LED flashes slowly).
. With blue LED still flashing, return to #3 in the section above and enter its opener ID# from CHART A.
Continue with the remaining numbered steps.
Ensure number pad back lighting is of
Enter PIN
Press the UP/DOWN key.
Opener will operate.
Enter PIN.
. Press the UP/DOWN key
Press number key corresponding with desired door (1, 2, or 3).
Desired opener will operate
Enter main PIN.
Press PRGM key three times (LED will turn solid indicating keypad is ready for temporary PIN).
Enter temporary PIN (3-8 digits)
Press PGRM key one time (LED will blink twice and go out indicating a temporary PIN is set).
To cancel the temporary PIN, operate the keypad/door with the original main PIN.
Enter current main PIN.
. Press PRGM key one time (LED will turn solid indicating keypad is ready for new PIN).
Enter new PIN (3-8 digits).
. Press PGRM key one time (LED will blink twice and go out indicating a new PIN is set).
Remove battery cover and batteries. Replace if necessary. NOTE: Only use standard or alkaline AAA batteries. DO NOT use rechargeable batteries.
Drill a 3/32” pilot hole for the top mounting screw
Install included screw into pilot hole, leaving 1/8” gap between the screw head and wall.
Hook the slotted mount on back of keypad over the screw.
Mark and drill a 3/32” pilot hole for the bottom screw and secure keypad to the wall. (Do not over-tighten).
 【زاوية واسعة للغاية 130 درجة ورؤية ليلية فائقة 90 قدمًا】 نظام كاميرا أمان سلكي خارجي صوتي ثنائي الاتجاه، أنظمة مراقبة الفيديو المنزلية وكاميرات الأمان
KWD 162.500
【زاوية واسعة للغاية 130 درجة ورؤية ليلية فائقة 90 قدمًا】 نظام كاميرا أمان سلكي خارجي صوتي ثنائي الاتجاه، أنظمة مراقبة الفيديو المنزلية وكاميرات الأمان
KWD 162.500
 كاميرات الأمان اللاسلكية في الهواء الطلق: كاميرات لكاميرا WiFi للأمن المنزلي مع بطارية لوحة الطاقة الشمسية تعمل طاقة طقم الحركة مستشعر التنبيه للتصحيح الليلي IP66 IP66
KWD 24.500
كاميرات الأمان اللاسلكية في الهواء الطلق: كاميرات لكاميرا WiFi للأمن المنزلي مع بطارية لوحة الطاقة الشمسية تعمل طاقة طقم الحركة مستشعر التنبيه للتصحيح الليلي IP66 IP66
KWD 24.500
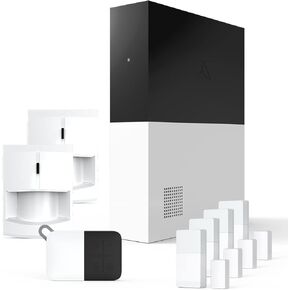 يعمل نظام الأمان الذكي اللاسلكي 8 قطعة - يعمل مع أجهزة Apple HomeKit و Z -Wave و Zigbee - قابلة للتوسيع لحماية منزلك بالكامل - التثبيت السهل DIY - مراقبة احترافية اختيارية
KWD 72
يعمل نظام الأمان الذكي اللاسلكي 8 قطعة - يعمل مع أجهزة Apple HomeKit و Z -Wave و Zigbee - قابلة للتوسيع لحماية منزلك بالكامل - التثبيت السهل DIY - مراقبة احترافية اختيارية
KWD 72
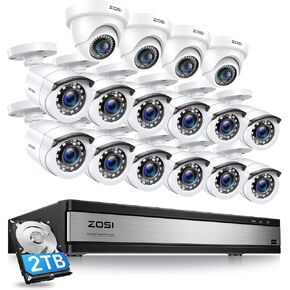 Zosi 1080p 16 قناة Home Camera Camera Camera مع AI Human Careens ، H.265+ DVR ، 16 × 1080p CCTV Bullet Dome Camera خارج الهواء
KWD 155.500
Zosi 1080p 16 قناة Home Camera Camera Camera مع AI Human Careens ، H.265+ DVR ، 16 × 1080p CCTV Bullet Dome Camera خارج الهواء
KWD 155.500