- التسوق ، اصبح سهلا.
- /
- احصل على التطبيق!
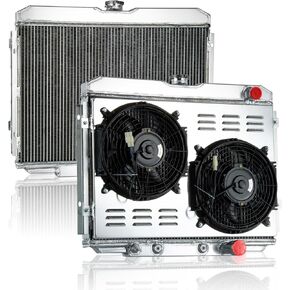
Specification
Core Size: 27.81 x 16.88 x 0.63 inches
Interchange Part Numbers: DPI# 4232, 74232, 884600R030, TO3030325
Material: Aluminum construction with louvered fins and furnace-brazed tubes
Fitment
Designed to fit the following Toyota RAV4 models:
2018 RAV4 Adventure
2017-2018 RAV4 Platinum
2016-2018 RAV4 SE
2013-2018 RAV4 (submodels: LE, Limited, XLE)
This AC condenser offers a seamless replacement solution, matching OEM specifications for straightforward installation. The lightweight design and robust construction make it a practical choice for restoring your vehicle's air conditioning efficiency.
How to Replace an A/C Condenser
Step 1: Safely Recover the Refrigerant
Use a certified refrigerant recovery machine to discharge and recycle the AC refrigerant from the system. This protects the environment and ensures compliance with safety regulations.
Step 2: Remove Obstructing Components
Take out any parts blocking access to the condenser, such as the front bumper cover, radiator shroud, or engine splash guard. Use appropriate tools (screwdrivers, socket wrenches) and set aside fasteners in a labeled tray to avoid loss.
Step 3: Disconnect the AC Lines
Locate the inlet and outlet lines connected to the condenser. Use a line wrench to loosen the fittings and carefully remove the pipes. Have a rag handy to catch any residual refrigerant oil. Pro Tip: Note the position of each line for easier reinstallation.
Step 4: Remove the Old Condenser
Unbolt the condenser from its mounting brackets (typically located behind the radiator). Gently lift it out, taking care not to bend the delicate fins. If the condenser is stuck, wiggle it slightly while pulling straight back.
Step 5: Install the New Condenser
Position the new condenser into the mounting brackets and secure it with the original bolts. Ensure it's aligned properly to avoid stress on the AC lines.
Step 6: Reconnect the AC Lines & Replace Seals
Attach the inlet and outlet lines to the new condenser. Replace all O-rings with fresh, manufacturer-approved seals (apply a drop of refrigerant oil to each O-ring to prevent damage during installation). Tighten the fittings firmly but do not over-tighten to avoid stripping threads.
Step 7: Recharge the System
Have the AC system evacuated to remove moisture, then refill it with the correct type and amount of refrigerant as specified in your vehicle's manual. Test the system to ensure proper cooling and check for leaks.

 مروحة كفن مشعاع من الألومنيوم 3 صفوف لسيارة فورد موستانج 1967-1970، ميركوري كوغار
KWD 96.500
مروحة كفن مشعاع من الألومنيوم 3 صفوف لسيارة فورد موستانج 1967-1970، ميركوري كوغار
KWD 96.500
 CC161 مروحة كفن الرادياتير لعام 1968-1973 Chevy Chevelle ، 70-79 Monte Carlo El Camino Impala ، 67-77 Oldsmobile Cutlass ، 68-73 Pontiac GTO والمزيد من السيارات ، 3 صفوف من Rows Core Radiator.
KWD 121.500
CC161 مروحة كفن الرادياتير لعام 1968-1973 Chevy Chevelle ، 70-79 Monte Carlo El Camino Impala ، 67-77 Oldsmobile Cutlass ، 68-73 Pontiac GTO والمزيد من السيارات ، 3 صفوف من Rows Core Radiator.
KWD 121.500
 مروحة كفن الراديات من الألومنيوم من أجل Chevy C/K 2500 3500 Pickup 7.4L V8 1988-2000 3 استبدال المبرد RAW لـ GMC C2500 C3500 7.4L V8 1998 1999
KWD 111.500
مروحة كفن الراديات من الألومنيوم من أجل Chevy C/K 2500 3500 Pickup 7.4L V8 1988-2000 3 استبدال المبرد RAW لـ GMC C2500 C3500 7.4L V8 1998 1999
KWD 111.500
 3 صف من الألومنيوم كفن كفن متوافق مع فورد موستانج تورينو فالكون مناسبة مع Mercury Cougar L6 V8
KWD 113
3 صف من الألومنيوم كفن كفن متوافق مع فورد موستانج تورينو فالكون مناسبة مع Mercury Cougar L6 V8
KWD 113


